How to Register Yourself
Step-by-step instructions for using Mustang Express to search for classes and register.

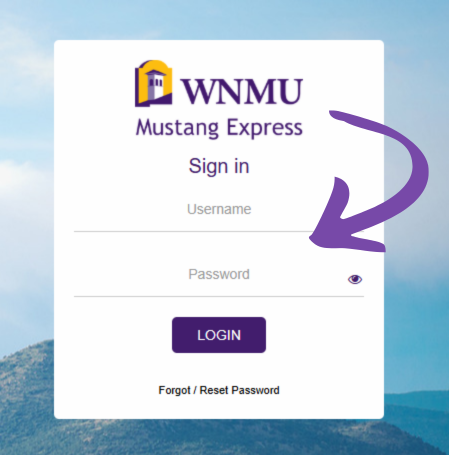
Step 1: Go to Mustang Express and enter your WNMU username and password. After logging in, you will begin from the student account dashboard.

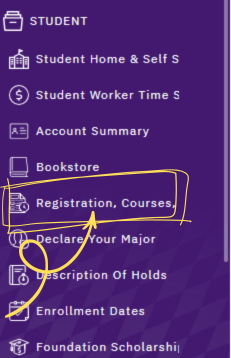
Step 2: From the Student area, select Registration, Courses. This takes you to the registration tools you need to search and add classes.

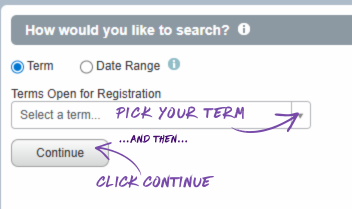
Step 3: Choose the term you want to register for. Then search by Subject, and add a course number or keyword if needed. Select Search to see available classes.

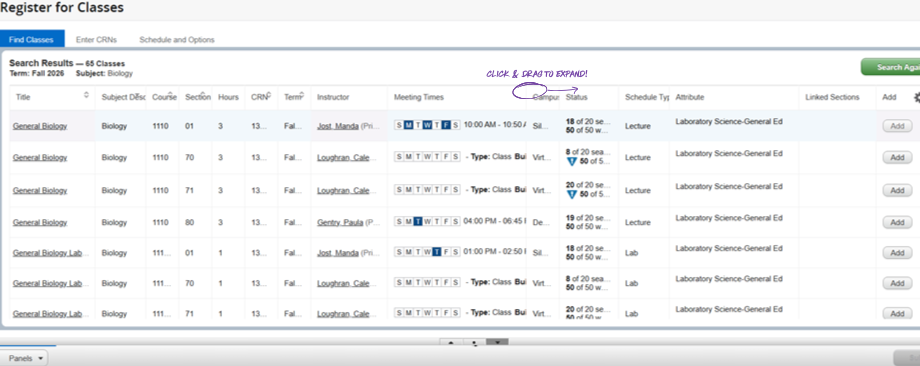
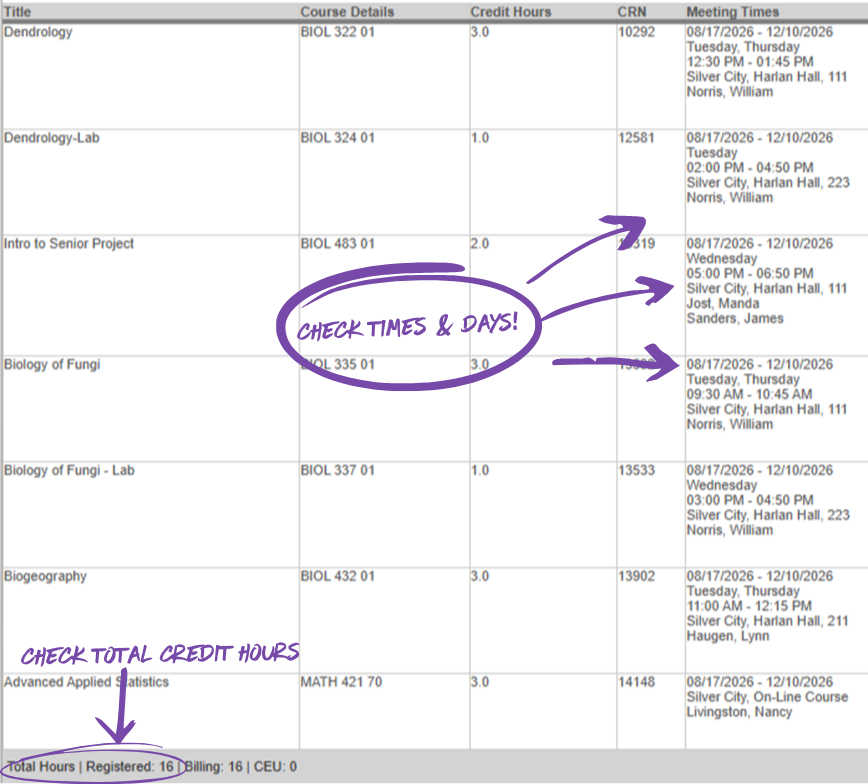
Step 4: Review the course list carefully. Check meeting times, campus, delivery method, and section details before adding classes.

Step 5: Review your schedule carefully. Make sure classes do not overlap and confirm your total registered credit hours.

Step 6: Submit your registration changes and review your final schedule carefully. If a class will not add, contact advising for help with holds, prerequisites, or registration restrictions.

Before You Begin
Before you start registering, it helps to know your term, have an idea of the classes you need, and be ready to check for time conflicts. If you are unsure what to take, meet with advising before making changes to your schedule.
- Know which term you want to register for.
- Have course names or subjects ready to search.
- Review your degree plan or advising notes first.
- Check your final schedule carefully before you submit changes.
Need Help Registering? If you need help choosing classes, understanding degree requirements, or navigating the registration process, the Advising Center is here to support you. Our advisors are happy to answer questions, help you build a schedule that works for your goals, and make sure you feel confident before registering. Whether you are registering for the first time or just need a quick check-in, we encourage you to connect with an advisor.